
Why Link-In-Bio Pages Matter
A bio page serves as a single, centralized hub for your digital footprint. Instead of changing single links in your social media bios, a branded bio page lets you send your audience to multiple destinations - such as your main website, store, latest video, or social profiles—all from one clean link.1
Access the KlipLink Dashboard
Sign Up or Log in to your KlipLink account and head to the Pages Section in the sidebar. This is where you will create, edit, and manage all your link in bio pages.
2
Create a New Page
Click the + Bio Page button at the top of the page. In the popup form, fill in your details:
- Title: Give your page a recognizable title, this will also be visible on your public page.
- Domain & Custom Back-half (Optional): Choose your domain and customize the back-half (e.g.,
klipl.ink/socials) to make your bio link easy to remember.
3
Set Up Profile & Social Icons
In the Page Layout tab:
- Click the edit icon next to your page title to set your Page Title and Page Bio.
- Click the social icon row to add your profile handles for channels like Instagram, X (Twitter), YouTube, TikTok, GitHub, LinkedIn, Discord, and Spotify.
4
Add Links & Content Blocks
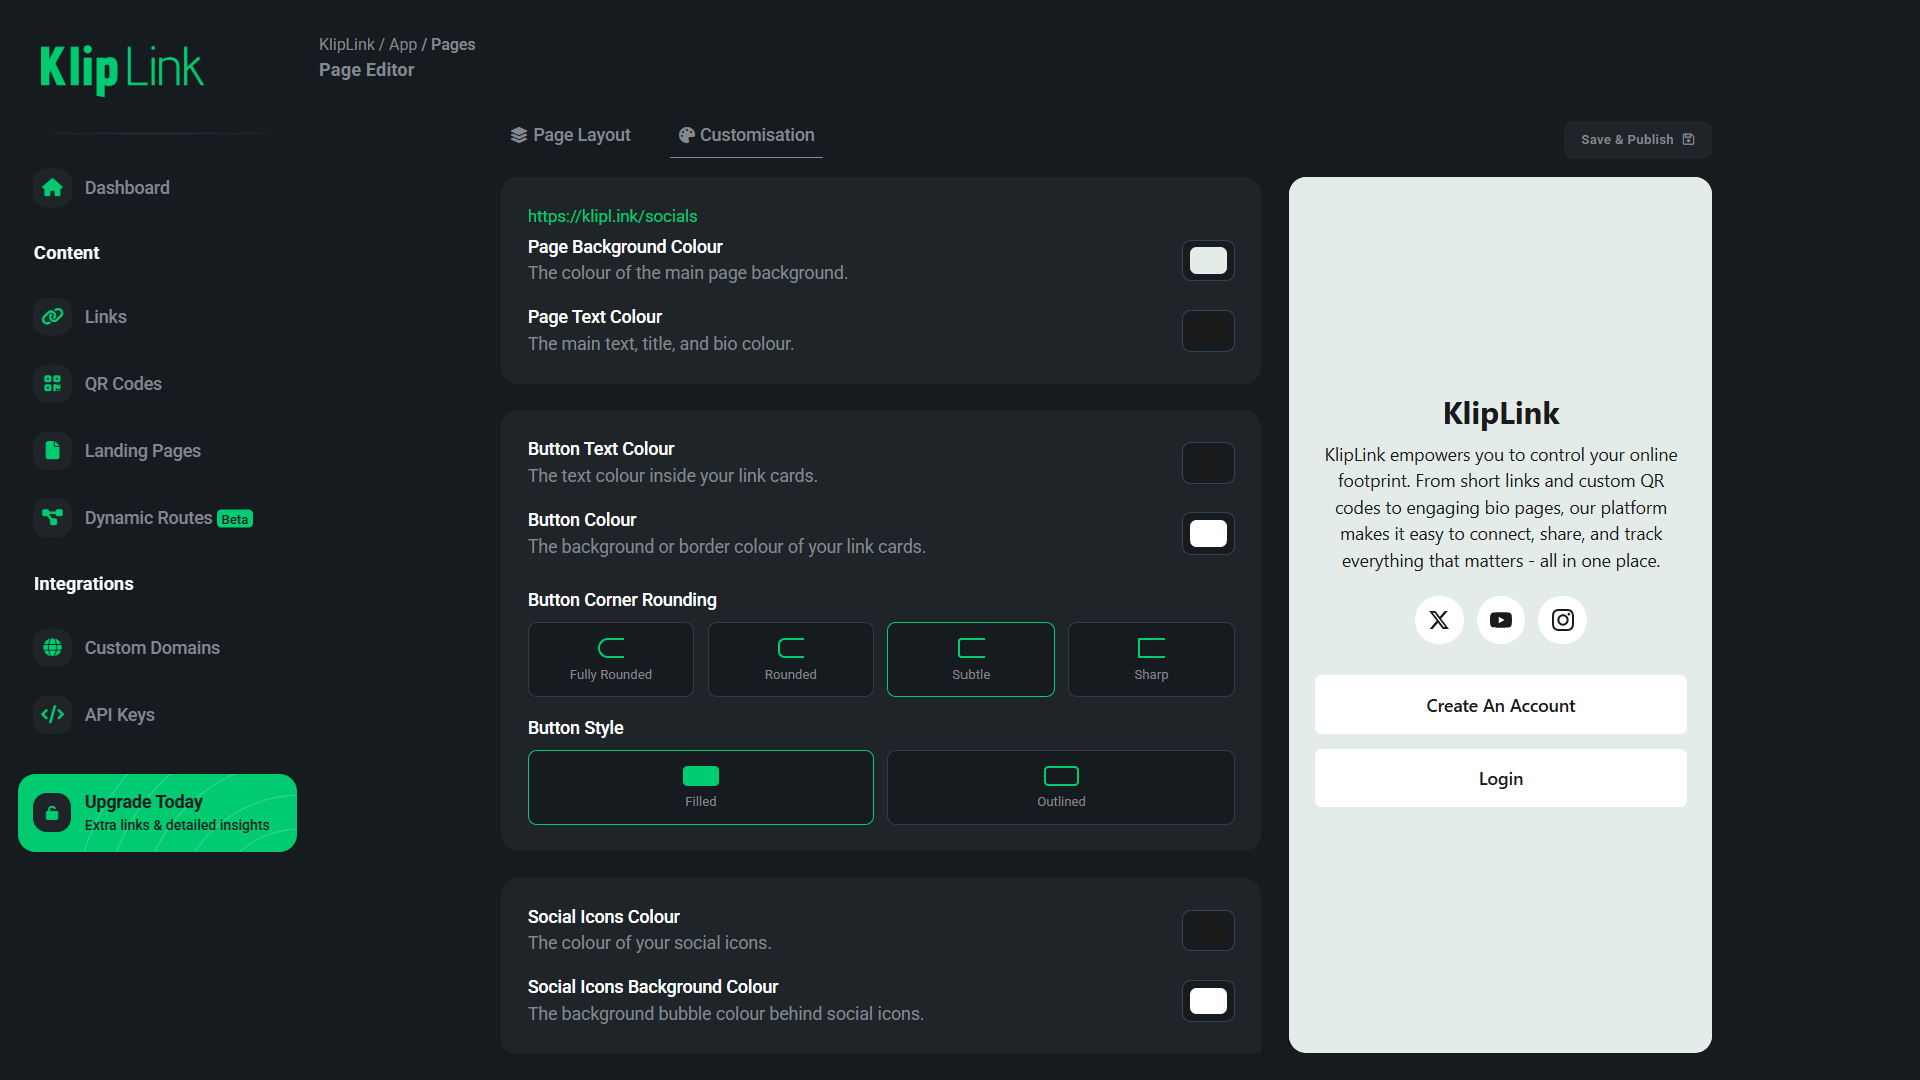
- Enter a Button Title (e.g., “Our Website”) and the Destination URL.
- Preview the destination link on the right side of the editor, then click Add.
- Reorder your buttons directly on the layout view by dragging them into your preferred order.
5
Customise Your Bio Page Design
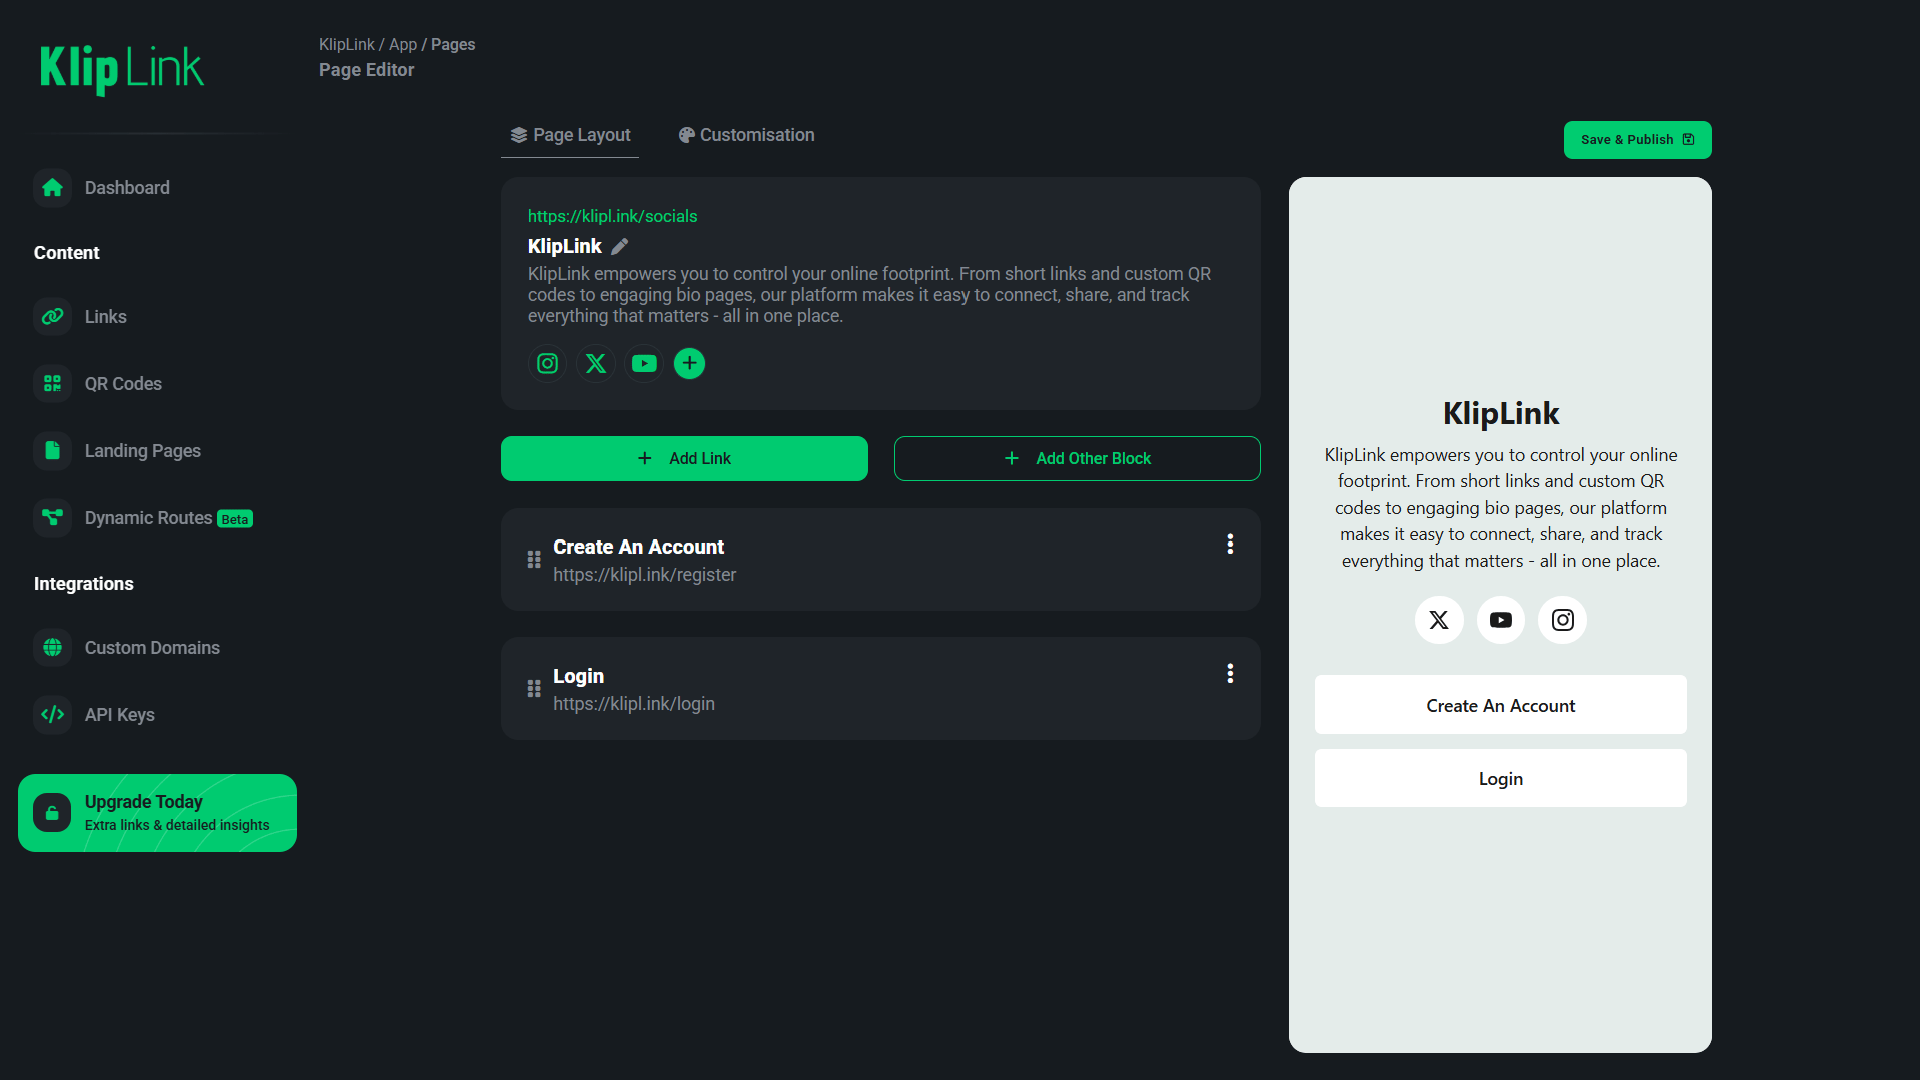
- Colors: Customize your Page Background Colour, Page Text Colour, Button Text Colour, Button Colour, and Social Icons Colour.
- Button Corner Rounding: Choose between Fully Rounded, Rounded, Subtle, or Sharp corners.
- Button Style: Select between Filled or Outlined button designs.
- Social Icon Style: Set your social icons to Filled, Outlined, or Icon Only.
6
Save and Publish
Review your page in real-time using the live preview on the right side of the editor. Once you are happy with the layout and design, click Save & Publish at the top right.
Benefits of Using KlipLink Pages
- Consolidate all your key links under a single branded URL
- Real-time mobile preview while editing your page layout and styling
- Fully brand-aligned customization options for colors, button shapes, and icon styles
- Built-in analytics to track visitor numbers and link engagement